One berry, two berry, pick me a blueberry, as they say in Jamberry. This past weekend I had one berry, two berry, eight pounds of blueberries. I made a special order from my CSA – a typical box dosn’t just come with eight pounds of blueberries. Eight pounds was overwhelming for about a minute. And now they are all used up – just like that. Continue reading
Tag Archives: homemade
My CSA Box: Apriums
Here at Nerdhaven Farms West we grow plenty of edibles – but we have more hungry mouths than we can feed from of our harvests of artichokes, apples, apricots, blackberries, tomatoes, figs, persimmons, kale, lovage, sorrel, dandelion greens and, last but not least, eggs. So we supplement our harvest with a community supported agriculture subscription, also known as a CSA box.
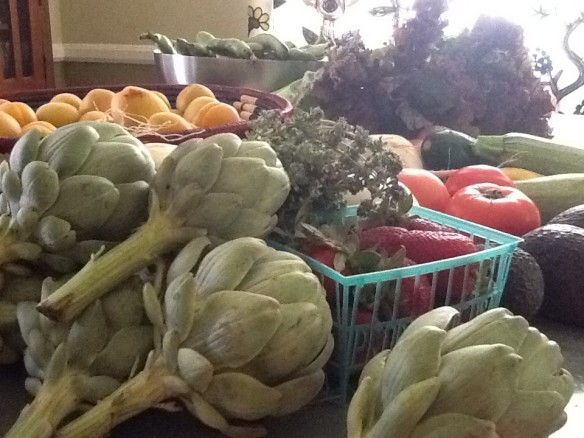 Our CSA, Abundant Harvest Organics actually calls itself a farm-share delivery service. My understanding is that with a CSA, one buys a share in whatever a specific farm is growing. AHO, on the other hand, organizes and delivers the harvest from an alliance of small family farmers in California’s Central Valley. So AHO delivers us bounty from not just one farm, but many; providing our hungry peeps here at Nerdhaven West with a wide variety of organic produce (as well as other tasty stuff like herbs, eggs, meat and dairy by special order). (But we call AHO a CSA anyway. FSDS sounds like a florist.) The photo above is the contents of this week’s box. Yum, right? Every Saturday morning between 10 and 11, we drive over to the local Lutheran church parking lot and pick up what we call “the veggie box.”
And then every Saturday morning at 11:01 a.m. I start figuring out what to do with the contents of that week’s veggie box. Eek. Continue reading
Better Late than Never
Better Late than Never
Am I right? Oh man – I hope so. I would like this blogging thing to work out. I remain hopeful that it will. And so, I push on again.
In the many months that have come and gone since I last posted here, I’ve been kinda busy. Among other things happening around Nerdhaven West, I completed a course in food preservation – the Master Food Preserver Program offered by the UC Cooperative Extension. I am now a Master Food Preserver (can’t you just hear the trumpets?)
Food preservation – like blogging, apparently – requires an optimistic spirit. Food preservers regularly face the existential question: “Will this be good to eat in a year?” (i.e., toxic? tasty?) In a preservation project, one commits the time, energy and resources in the present and hopes for the payoff in the future. Certain predictors maybe increase the likelihood that it will be worth it – but one can never truly be certain . . . One predictor of success is whether the food was preserved following a tried and true recipe. Hope is nice, but it can’t prevent a mold from forming or make a product taste good.
But with this project, I’m not really following the rules. So hope is all I have to go on. As a cook, this style makes me nervous. It violates my Virgo-lawyer sense of order. Rules are good. I love rules. This particular project, what I’m writing about today, it’s more my sister’s style – she has been known to go off road in her cooking. I mean – hey, it’s just food!
And in this case it’s not even food. It’s booze: nocino. A liqueur made from green walnuts and aromatics soaked in vodka. I learned about nocino in my Master Food Preserver class, where it was spoken of in somewhat hushed tones . . . the flavor is elusive . . . think cinnamon toast and coffee and maybe some Coca-Cola in there . . . but soooo good. The idea stayed with me because it is such a delicious way to use green walnuts, a fairly common Southern California backyard nuisance – um, I mean fruit.
While the taste of nocino lingered in my mind, the recipe did not. So when a friend called me up on August 4 and said, “hey I have walnuts on my tree and they are starting to fall, do you want any?” I took a quick look at this David Lebovitz blog post (to see how many nuts I needed to harvest) and ran right over with my picker and my trusty assistant:
 Then I promptly came home and chopped those babies up. I had a feeling the walnuts were a bit past their prime, because when I chopped them, they didn’t look exactly like the David Lebovitz photo I saw before I ran out to go pick. His looked all young and fresh and perky and lovely. Mine looked like this:
Those are some old, hard nuts, am I right? Turns out, nocino is made from walnuts picked on June 24th – the feast day of St. John the Baptist. That is when the nuts are soft enough to cut with a knife. But I was not hampered by the knowledge of this rule at the time. I picked my walnuts on August 5 and chopped them all up and put them in the vodka on August 6. Later I learned, from this helpful LA Weekly blog article, that while the green walnuts are traditionally harvested on June 24, really they are still soft enough to be picked for nocino into July. Later than that, the walnuts have begun to form their hard shells, making them difficult to cut open. And then, “By August, it’s a done deal and you have to wait for next year.”
Wait, what? Done deal? I made it already! What do you mean, done deal? Like they cannot be cut? I cut mine. Okay maybe some were more like smashed; and some I could only cut into halves, not quarters as the recipe instructed. But still, the interiors are plenty exposed to the alcohol. Or does the author mean done deal as in, don’t even try it because the old-ass walnuts are too mature to be tasty and what you end up with after months of maceration and resting is a black and boozy substance too bitter to imbibe. Who knows? But I hoped. And then I put my container of walnuts and vodka in a cool dark place and moved on.
Until today, when – ever hopeful – I went to put another food preservation project (fermentation) into my cool dark place and ran into my old friend the nocino container. Doh. I realized I was supposed to strain it like two weeks ago. So I strained it out. Here’s a photo of the solids, they were beautifully shiny and black and looked very Halloweeny:
Of course I also tasted it. But of course! And it seemed . . . fine. I’m refraining from judgment. I compared it with the sample I received from the MFP course, and mine was stronger, harsher. But hey, the MFP sample has been sitting around for a long time, maybe a year or more. It’s a wise old brew. My nocino is in its infancy. A wee babe. The Baby Huey of liqueurs – and made with old-ass nuts past their prime.
Both of the recipes I consulted said that the nocino should sit for a couple months to mellow – so mine is on track for the Holidays. Maybe this might all work out. Maybe I’ll have a homemade gift to give this year. Maybe I’ll be ringing in the New Year with some nocino. Here’s hoping!
My August 2012 Nocino
Adapted from the recipes of David Lebovitz and Felicia Freisema
Some notes: (1) don’t wear clothes you care about when you are making this recipe. These walnuts are crazy-staining. (2) Wear gloves – ones that nothing can soak through – and still be prepared to have your fingers stained afterwards. I wore gloves and my fingers were still stained a week later. (3) Here is a tip from David Lebovitz which saved my life: use a cleaver, tap it into the skin of the green walnut, then lift the cleaver and whack it down on the cutting board to split it (I used the same technique with a butcher knife, and it worked).
60 walnuts, washed, dried and chopped/smashed into quarters or halves
5 cups sugar
2 liters vodka
4 sticks cinnamon
20 whole cloves
zest of two lemons, peeled off in long pieces with a vegetable peeler one vanilla bean, sliced lengthwise
1. Place the walnuts into a large container with a tight-fitting lid and pour the vodka over and be very psyched that you actually did this thing. Now go clean up the mess from the chopping/smashing.
2. Wait two days and then realize you forgot to add the other tasty ingredients. Add all the ingredients except the sugar. Stir well.
3. Wait two more days and then realize you forgot the sugar. Geez. Add the sugar and stir well. Put nocino in a cool, dark place.
4. Wait two months. Find the nocino. Strain it through a cheesecloth to remove the sediment (especially if you used the smashing technique). Then decant into clean and sterilized bottles. I understand that nocino mellows as it sits, so don’t drink this right away if you think it’s too strong or bitter. Decant it and then let it rest a couple months before using it.
5. Put June 24 into your calendar for harvesting green walnuts next year.
Frugalicious Freezer Exploration
So – schwhateva on that $100/week for groceries not including the CSA box thing . . .
When my mother (who is a thrifty shopper) said it couldn’t be done, I should have listened. Listen to your mother! She said she spends over $100/week in groceries for just her and my Dad, so she doubted I could do it for us four – especially with two growing (and prosciutto-loving) teens/tweens.
Well she was right. There I’ve said it: It’s a little over halfway through February and I am over my $650 for the month. I have some stuff in my freezer, but not enough to feed us through the month, right? Okay, time for real-time freezer inventory. I’m at the freezer now (this could get embarrassing):
Bag of frozen peas
Bag of frozen corn (okay, I’m going to stop saying each thing is frozen)
Pint of vanilla ice cream
Container cranberry cocktail concentrate (I had an idea about margaritas – didn’t pan out)
Bag of leftover homemade latkes
2 bags leftover homemade pancakes
Miscellaneous Go-gurt tubes of undetermined vintage
Gallon bag pork barbeque (dated September 2011)
3 bags of 1.5 quarts homemade chicken stock (that’s money, baby)
Gallon bag of undetermined beige substance – here, you guess:
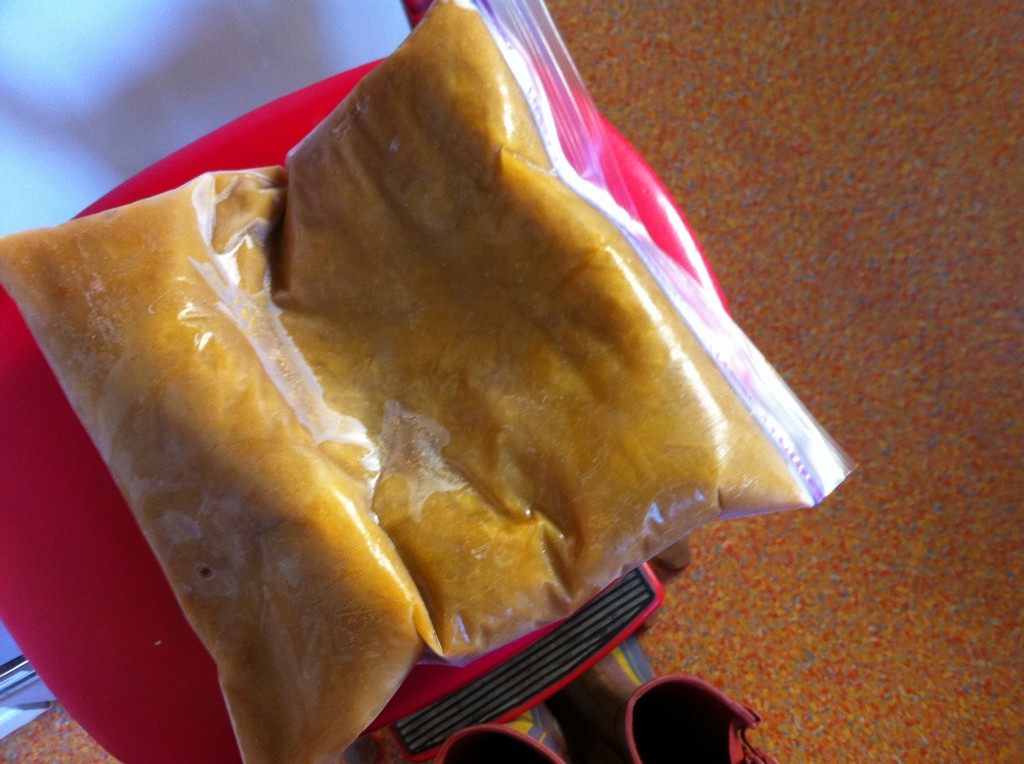 Post a reply if you have an idea – now back to the list:
2 1lb packages grass fed ground beef (on sale at $5.99/lb so I bought extra)
Another unidentified bag of something appearing to be of tomato-sauce origin
2 quart bags homemade veggie soup (made this last week, it’s really good)
2 qt leftover beef soup from January 2012
1 qt bag of undetermined – again tomato-ey in origin
Box Dr. Praeger’s California Veggie Burgers
1 pint bag of pomegranate seeds
1 whole pomegranate
1lb ground coffee
One-half loaf Ezekiel bread
and finally:
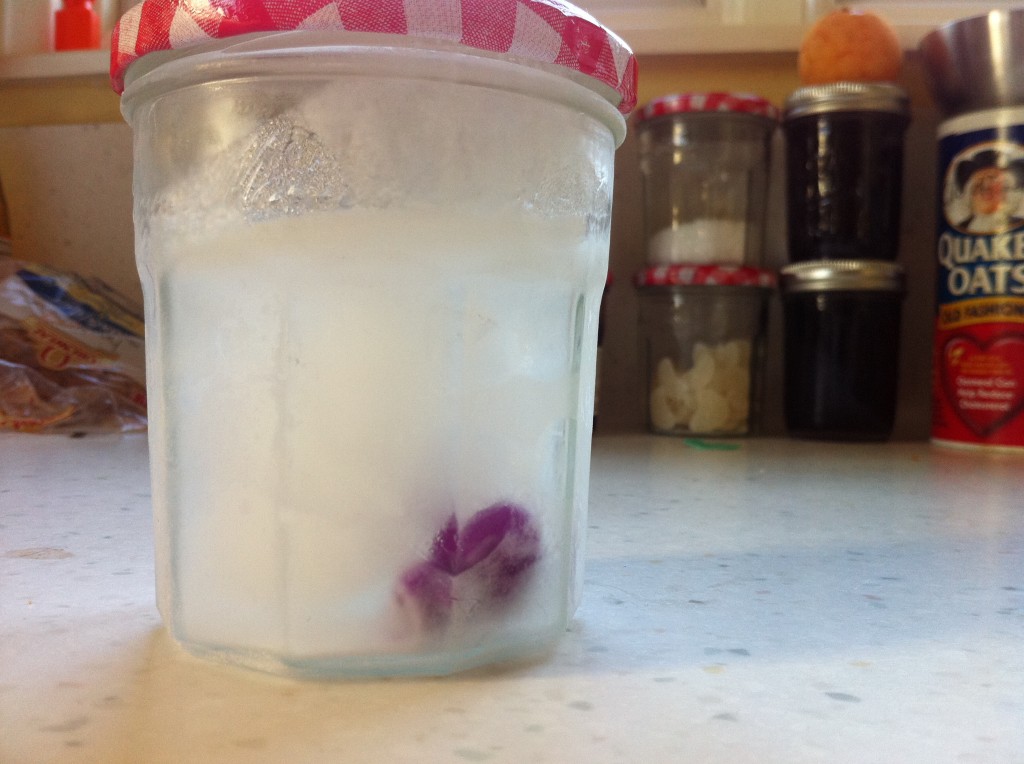 One lego dude frozen in a jar of water.
Oh my gosh – I feel so exposed. But I also feel heartened – I have some food I can use to keep my expenses down this month. I am taking the pork BBQ out for dinner tonight. We can have the frozen peas since we don’t get a new infusion of green until the CSA box tomorrow, and I’ll have to make some potato thing for a starch, since I don’t have buns (the potato latkes?). . . okay you all don’t need to hear me thinking aloud. You already know what it’s like cobbling a dinner together.
So, thanks for going on this impromptu adventure with me. I doubt I can go the rest of the month without buying groceries – but I am going to use up stuff in the freezer. After all, I froze it to use it. And of course I will keep freezing as I go. I’m not ready to give up on my $650/month goal just yet, and I will spend the rest of February keeping very close track of things. That way, I can have more information to decide whether or not it’s feasible for next month.
And maybe the extra expense for food could go into the “wants” category. . . . The food we eat isn’t just calories to fuel our bodies. Dinner is really our one regular family activity. Sure, we go on the occasional outing together (we call them RFT – random family trips), but on a regular daily basis, dinner is where we all come together. It’s not that we sit around discussing current events and Shakespeare every night – sometimes we play a card game or watch an episode of Chopped. Sometimes it’s a homework dinner and sometimes it’s reading night – be we are all together. And the food brings us there. Beyond the calories, vitamins and minerals we need to survive, I want the food experience to be as fun and tasty as possible. So it makes sense to put some of the extra expense into “wants.”
By the way, I will let you know what the undetermined stuff is. Hopefully it’s tasty!
P.S. I also realized that when I use my bank records to add up my grocery bills (I use a bank card for everything), I can’t distinguish between food and non-food items (dish soap, toothpaste, etc.) that I buy at the grocery store. I’m going to have to start saving receipts . . . just what I need, more paper around the house.
Fresh and Exciting
So we are doing taxes and financial aid forms for colleges ($55K a year for college! Really? Just in case there wasn’t enough of a divide between the 99 percent and the 1 percent . . . sheesh don’t get me started). We are up to our eyeballs in money talk these days. So for a minute or two I am going to put off the actual hard-core analysis of breaking down our finances and skip to healthy, simple (and cheap) food, which is what I’m trying to work on every day, anyway.
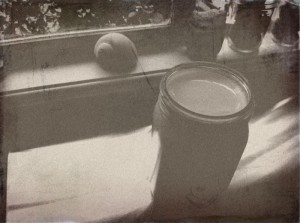 I’m trying the basics: Living my life responsibly and making my own stuff, when I can – and trying to learn something new every day. Recently, I learned that I can make yogurt. This is not trumpets-blaring news, I know. But it’s exciting for me . . . I finally did it after wondering about it for, like, ever.
Folks have been making yogurt – in a zillion different forms – all over the world for generations upon generations, probably as long as mammals, bacteria and humans have co-existed. (I’m picturing the first moment of yogurt – some suspicious wife passes some old, curdled milk toward her husband and says, “Taste this – is it still good?”) I am happy – okay, proud – to now be part of the flow of the history’s yogurt-making peoples.
I can’t believe it took me this long to try yogurting myself. This is easy, tasty and cheap – just like they did it in the old country. It is really a testament to the power of marketing that we all go out and buy this stuff when it is so easy and soooo much tastier to make it at home. This yogurt does not resemble the typical grocery store kind at all. It’s more like what you’d get from Greek yogurt – but the flavor is not just tangy, it’s delicious. Maybe because it is made so fresh.
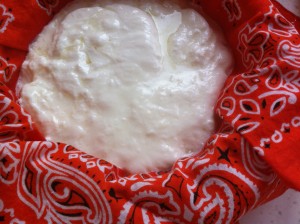 Yogurt
Adapted from Milk: The Surprising Story of Milk Through the Ages by Anne Mendelson (Although the recipe is all over the place, I like to cite a reliable source.)
If you and/or your family are not yogurt freaks, like we are, you could just cut this recipe in half. It works just fine and heats and cools faster.
Ingredients:
1/2 gallon whole or 2 percent milk
3 tsp. plain unflavored yogurt with active cultures
Equipment:
2 quart-sized glass jars
Gas oven with pilot light (or not, see Note below)
Candy thermometer (or you can just eyeball it)
1. Heating/Cooling: Pour the milk into a heavy saucepan. Attach the candy thermometer, if using. Heat to 180F (until it’s just about to boil). Take the milk off the heat and cool to 110 º F (not quite hot to the touch). You can put your pot in a larger bowl with ice water to speed up the process to 10-15 minutes or so. Or you can just let the milk cool on its own (while you watch the Daily Show, for example) for 25-30 minutes or so.
2. Inoculating: Put 3 Tbsp. of store-bought yogurt in a small bowl and stir about 1 cup of the milk into it. Then stir this mixture back into the pot of milk.
3. Incubating: Pour the milk into the two quart-sized glass jars. Gently place the two jars in the oven – no need to cover – and then do not disturb or jiggle or bounce or jounce or anything for 6 -7 hours. My routine is to make this overnight – the kitchen is quiet, and I get to cook while I sleep. Nice.
4. Waking: In the morning, shuffle into the kitchen to find two containers of yogurt in the oven! I save one to use in smoothies (awesome – although what will I do without that constant stream of 32 oz. plastic yogurt containers coming into my life?). With the second container, I move onward – and upward – to step 5.
5. Draining: This step isn’t necessary if what you are want is a yogurt to use in smoothies, or if texture is not a big deal to you. But if you want a hauntingly delicious yogurt to eat with honey or preserves, or to use in a dip or salad – you really must drain it. Once I tasted the drained yogurt – I couldn’t get the taste out of my head. I wanted more . . . Here’s the step: Line a strainer with a bandana (see fancy orange bandana in photo above) and place it over a bowl deep enough to catch 4 cups liquid. Then pour the yogurt into the strainer and let sit about 3 hours. Turn the yogurt out into your storage (or serving) container and stir until smooth. Serve yourself some yogurt right away, spoon some honey on top and . . . prepare to have your mind blown. Enjoy.
Note: Denise has joined the yogurt-making flow by making yogurt without a pilot-lit oven. You go girl! Just use a hot-cold plastic container, or wrap the jars in towels and put them in a cooler. Whatever it takes to keep the incubating yogurt cozy at 110 º F. If the temperature drops below 110 º F, the yogurt will be thinner or take longer to set. But as long as you have the active starter and a peaceful place for the yogurt to incubate – yogurt will happen.
P.S. Making yogurt at home is also – big surprise – cheaper than buying it at the store. Two quarts of this yogurt cost me $3.00 to make (I used 1/2 gallon of organic milk, which I buy at Trader Joe’s for $5.99/gallon). While the price for one quart of organic yogurt at TJ’s is $2.99. So I am getting two for the price of one by making my own. True – when I don’t buy the yogurt at the store I do not get the quite useful plastic tub it comes in . . . but I will trade the tub out for being that much closer to saving 30 Large.
P.P.S. Did you like my old-school yogurt photo? I took the photo on my phone and old-schooled it on this cool Japanese site. I’m going there now to make all my photos old.
