Happy May!

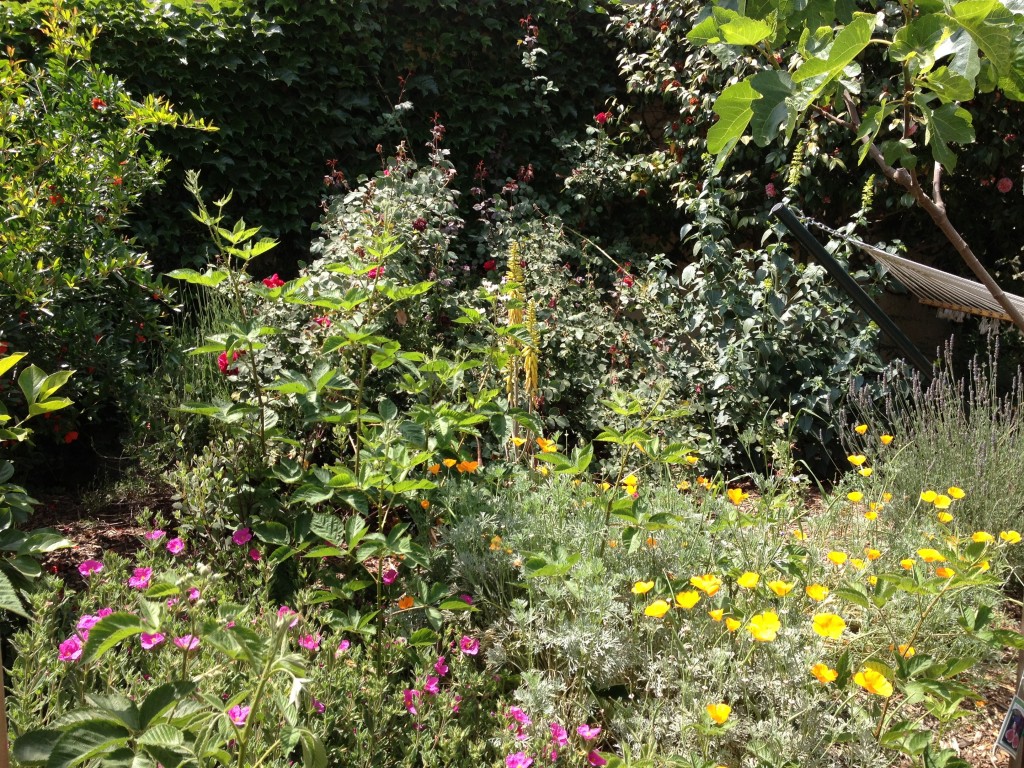
imageHappy May! My garden is booming – I feel so happy just looking at it – so I thought I’d share this little glimpse.

One of the best garden design choices I have ever made is to just do away with any attempt at a lawn, or really any kind of order, and just put the plants where they fit, and then scatter some seeds around them. The plants you can see in this photo include: California native poppy, Chickasaw blackberry, Aloe, Mission fig, Wonderful pomegranate and the crazy old rose bush that came with the house.

Also off to the right side of the photo you can see the tip of a double-wide hammock – my second best garden design choice.

Haters Gonna Hate

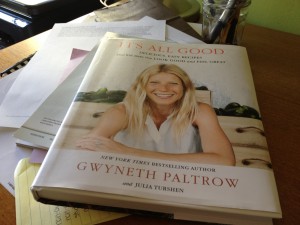
get-attachment.aspxI guess I have my own haterish issues with this, but here I am writing about Gwyneth Paltrow’s new cookbook, It’s all Good: Delicious, Easy Recipes that will Make you Look Good and Feel Great. And, while I’m not crazy about the over-used phrase in the title, I’ve made several recipes from the book, and I’m here to say: I like it. I really like it.

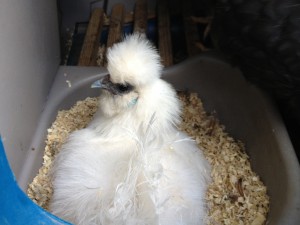
Full disclosure here: I read Gwyneth Paltrow’s stuff. I have her first cookbook (note to haters: it’s pretty good); I have her travel app (it was kinda helpful on our trips to London and New York); and I subscribe to her blog Goop (although I often don’t read it – a $500 blouse? Yeah, whatever). And, of course, we named our beloved silkie, Gwyneth Poultry, after her. Take a look. The resemblance is obvious, right?

IMG_4171

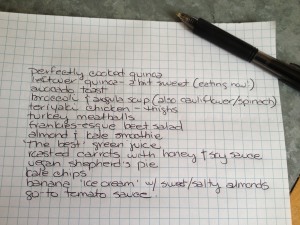
The New York Times recently published this review on their blog about It’s all Good, which was just over-dramatically critical. For example, the article said the book, “makes it seem that healthy eating is strictly for the wealthy.” Like you need to spend $300 a day to cook from this book. Oh, please. I have made several recipes from It’s all Good that were super cheap. I say it’s a testament to the cheapness (and simplicity) of the recipes that I was able to make so many of them with ingredients I already buy. In fact, here’s a helpful list of the cheap and easy things I’ve made so far:

get-attachment-1.aspxThe review went on to say that the cookbook was, “quack science . . . attempting to export Paltrow’s wacky elimination diet . . . to a populace that’s improperly nourished and financially struggling.” Alright. Get over yourself, New York Times. First, in my work as a legal-aid attorney I have had the opportunity to meet thousands of improperly nourished (maybe) and financially struggling (definitely) people – and I feel pretty certain that none of them are going to buy this book. None. They have many more important things to spend their money on, like food.

Moreover, who says an elimination diet is wacky? Monsanto? Part of the joy of being an omnivore is that we can choose what we eat. There is nothing wacky about deciding to limit or eliminate processed foods, dairy, white flours and red meat from one’s diet.

And finally – it’s a cookbook, people. Just because G.P. publishes a cookbook based on her current ideas about health and nutrition doesn’t mean she’s telling everyone to eat that way. And just because I read her book (or her blog for that matter) doesn’t mean I have abandoned my free will, or critical perspective, and become her zombie-like follower.

Hopefully I’m not too optimistic, but I think that people (even financially struggling ones) are capable of taking information and deciding what works for them and what doesn’t, and not blindly following a cookbook like it’s gospel.

My rant is now over. Now let’s talk about food. Hello there, food . . . My favorite recipe so far has to be the turkey meatballs. I made a few adaptations to G.P.’s recipe (see above reference to free-will) that make them work for me given the ingredients I usually have on hand. And I have doubled the recipe, so I can keep them in the freezer for a quick lunch or to throw in some tomato sauce for dinner. Haters, begone!

Miraculous Turkey Meatballs
Adapted from It’s All Good by Gwyneth Paltrow and Julia Turshen

I’m certain the original recipe is perfect as is, but I happen not to have some of the herbaceous ingredients around generally, so I improvised a bit. What I did not alter at all was the crazy-brilliant idea of replacing the milk-soaked breadcrumbs and eggs typically used in meatball recipes, with a puree of onions and herbs.

Plenty of moisture to get the turkey to stick together + much more flavor than milk and egg soaked bread = miraculous meatballs.

2 small onions, roughly chopped
4 cloves garlic, roughly chopped
1T dried Italian herb blend (or use whatever dried herbs you like)
2 large handfuls of arugula (about 3 cups)
1/2 cup flat-leaf parsley
2 lbs. ground turkey (I used 1lb. white meat and 1 lb. dark meat)
2t kosher salt
1t ground black pepper

Preheat the oven to 325 degrees.

Put the onions, garlic, dried herbs, arugula and parsley in the bowl of the food processor and pulse until very finely chopped and mixed together into a kind of mash (but not a soaking wet mash – you don’t want all the juiciness to run out of the meatballs when you bake them). Put this mixture into a large bowl and add the turkey, salt and pepper. Use a spatula or your hands to thoroughly mix everything together. Then roll the mixture into 2.5″ meatballs (the size of a handball) and space them evenly on a baking sheet (I used two sheets). Bake for 25-30 minutes or until cooked through. That’s it. They are ready to go.

If you wanted you could under-cook them a tad and have them finish cooking in a tomato sauce or something. I’ve been eating them plain, on top of a salad, like this:

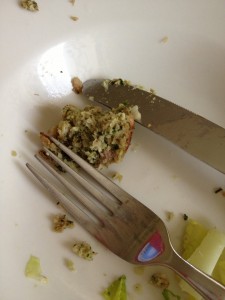
turkey meatballs Note to self: take the photo before you eat.

Snail slime

Clara and Teresa

Delighted to find a brave and outgoing ambassador for its species, Clara quickly made a leafy home for one snail, Teresa, in a recycled yogurt container.

In her bedroom, she transferred the snail to a toy glass and left the room for awhile. A few hours passed. When Clara returned to visit, she cried out. Teresa had exited the glass, which was somehow tipped on its side and its leaves scattered. Clara and I searched for the snail, eventually finding her, camouflaged, attached to the side of the wooden toy box.

I suggested that since Teresa was obviously no longer content in her glass, that it was time for Clara release her, emphasizing that she would certainly be happier in her own habitat. From past experiences I know this release process can be an emotional one. (When Clara released a tiny spider she had caught in her room a week or so ago, she cried for a full 20 minutes. How was I to know that they had built a relationship over the three days Clara held the spider in captivity? I hadn’t even known the spider had been in captivity.) In order for Clara to say her proper parting words to Teresa, I left her alone on the kitchen stoop. She sat on the back steps and I heard her talking to the snail while I paid some bills over the phone.

What came next was unexpected. Clara pulled open the screen door with a set sad expression. She told me the snail died before she could set it free. She must have kept it inside too long. When I seemed unconvinced, she reluctantly led me to its remains, which were gooey and gnarled. Clara, what happened? I asked. Her set face dissolved. Her cover story dissolved (Wait, my daughter has learned to make cover stories?)  I didn’t know, she said. I should have asked you first. I wanted to take her out of her shell. I didn’t know it would kill her. There are a lot more snails. I didn’t know.

I listened for a minute as she tossed her mixed emotions out one after the other as explanation, denial, statements of innocence, confusion and pure sadness. I just hugged her as I confirmed she hadn’t meant to hurt Teresa. She didn’t know.

A very sad lesson, which days later Clara still brings up. She hasn’t picked up any other garden snails. When a snail appears in the illustrations of one of her books she looks at me earnestly and says she didn’t know snails were attached to their shells.

I spared the readers the “after” pictures. Teresa was just a snail, but she’d had a name and was Clara’s friend for a brief time.

Better Late than Never

Better Late than Never

Am I right? Oh man – I hope so. I would like this blogging thing to work out. I remain hopeful that it will. And so, I push on again.

In the many months that have come and gone since I last posted here, I’ve been kinda busy. Among other things happening around Nerdhaven West, I completed a course in food preservation – the Master Food Preserver Program offered by the UC Cooperative Extension. I am now a Master Food Preserver (can’t you just hear the trumpets?)

Food preservation – like blogging, apparently – requires an optimistic spirit. Food preservers regularly face the existential question: “Will this be good to eat in a year?” (i.e., toxic? tasty?) In a preservation project, one commits the time, energy and resources in the present and hopes for the payoff in the future. Certain predictors maybe increase the likelihood that it will be worth it – but one can never truly be certain . . . One predictor of success is whether the food was preserved following a tried and true recipe. Hope is nice, but it can’t prevent a mold from forming or make a product taste good.

But with this project, I’m not really following the rules. So hope is all I have to go on. As a cook, this style makes me nervous. It violates my Virgo-lawyer sense of order. Rules are good. I love rules. This particular project, what I’m writing about today, it’s more my sister’s style – she has been known to go off road in her cooking. I mean – hey, it’s just food!

And in this case it’s not even food. It’s booze: nocino. A liqueur made from green walnuts and aromatics soaked in vodka. I learned about nocino in my Master Food Preserver class, where it was spoken of in somewhat hushed tones . . . the flavor is elusive . . . think cinnamon toast and coffee and maybe some Coca-Cola in there . . . but soooo good. The idea stayed with me because it is such a delicious way to use green walnuts, a fairly common Southern California backyard nuisance – um, I mean fruit.

While the taste of nocino lingered in my mind, the recipe did not. So when a friend called me up on August 4 and said, “hey I have walnuts on my tree and they are starting to fall, do you want any?” I took a quick look at this David Lebovitz blog post (to see how many nuts I needed to harvest) and ran right over with my picker and my trusty assistant:

Then I promptly came home and chopped those babies up. I had a feeling the walnuts were a bit past their prime, because when I chopped them, they didn’t look exactly like the David Lebovitz photo I saw before I ran out to go pick. His looked all young and fresh and perky and lovely. Mine looked like this:

Those are some old, hard nuts, am I right? Turns out, nocino is made from walnuts picked on June 24th – the feast day of St. John the Baptist. That is when the nuts are soft enough to cut with a knife. But I was not hampered by the knowledge of this rule at the time. I picked my walnuts on August 5 and chopped them all up and put them in the vodka on August 6. Later I learned, from this helpful LA Weekly blog article, that while the green walnuts are traditionally harvested on June 24, really they are still soft enough to be picked for nocino into July. Later than that, the walnuts have begun to form their hard shells, making them difficult to cut open. And then, “By August, it’s a done deal and you have to wait for next year.”

Wait, what? Done deal? I made it already! What do you mean, done deal? Like they cannot be cut? I cut mine. Okay maybe some were more like smashed; and some I could only cut into halves, not quarters as the recipe instructed. But still, the interiors are plenty exposed to the alcohol. Or does the author mean done deal as in, don’t even try it because the old-ass walnuts are too mature to be tasty and what you end up with after months of maceration and resting is a black and boozy substance too bitter to imbibe. Who knows? But I hoped. And then I put my container of walnuts and vodka in a cool dark place and moved on.

Until today, when – ever hopeful – I went to put another food preservation project (fermentation) into my cool dark place and ran into my old friend the nocino container. Doh. I realized I was supposed to strain it like two weeks ago. So I strained it out. Here’s a photo of the solids, they were beautifully shiny and black and looked very Halloweeny:

Of course I also tasted it. But of course! And it seemed . . . fine. I’m refraining from judgment. I compared it with the sample I received from the MFP course, and mine was stronger, harsher. But hey, the MFP sample has been sitting around for a long time, maybe a year or more. It’s a wise old brew. My nocino is in its infancy. A wee babe. The Baby Huey of liqueurs – and made with old-ass nuts past their prime.

Both of the recipes I consulted said that the nocino should sit for a couple months to mellow – so mine is on track for the Holidays. Maybe this might all work out. Maybe I’ll have a homemade gift to give this year. Maybe I’ll be ringing in the New Year with some nocino. Here’s hoping!

My August 2012 Nocino
Adapted from the recipes of David Lebovitz and Felicia Freisema

Some notes: (1) don’t wear clothes you care about when you are making this recipe. These walnuts are crazy-staining. (2) Wear gloves – ones that nothing can soak through – and still be prepared to have your fingers stained afterwards. I wore gloves and my fingers were still stained a week later. (3) Here is a tip from David Lebovitz which saved my life: use a cleaver, tap it into the skin of the green walnut, then lift the cleaver and whack it down on the cutting board to split it (I used the same technique with a butcher knife, and it worked).

60 walnuts, washed, dried and chopped/smashed into quarters or halves
5 cups sugar
2 liters vodka
4 sticks cinnamon
20 whole cloves
zest of two lemons, peeled off in long pieces with a vegetable peeler one vanilla bean, sliced lengthwise

1. Place the walnuts into a large container with a tight-fitting lid and pour the vodka over and be very psyched that you actually did this thing. Now go clean up the mess from the chopping/smashing.
2. Wait two days and then realize you forgot to add the other tasty ingredients. Add all the ingredients except the sugar. Stir well.
3. Wait two more days and then realize you forgot the sugar. Geez. Add the sugar and stir well. Put nocino in a cool, dark place.
4. Wait two months. Find the nocino. Strain it through a cheesecloth to remove the sediment (especially if you used the smashing technique). Then decant into clean and sterilized bottles. I understand that nocino mellows as it sits, so don’t drink this right away if you think it’s too strong or bitter. Decant it and then let it rest a couple months before using it.
5. Put June 24 into your calendar for harvesting green walnuts next year.
Working Backwards

So where have I been? Certainly not online. My family and I have traveled along the edges of the country in the past few months, yet I have not written about our adventures here. Why not?

This is the question I ask myself as I sit down to get this blog and this budgeting project back underway.

I see now that the urge to get our home finances in order may have had roots in deeper places than, even, financial freedom. I think it might have been rooted in some personal things that have nothing to do with money: reaching “adulthood”, cultivating responsibility, acting from my will, having the courage of my convictions, overcoming fears, and, finally but perhaps most importantly, integrating my adult financial life with my husband’s adult financial life (which, given that we married in our forties, has some complexities).

Somewhere along the way, March or April, I began to realize that all the little steps forward I was making and writing about were illusionary. They were not really moving my project closer to my overall goals. Yet I couldn’t figure out, or was in denial about, what was keeping me from making progress. With some thought, and time, I now realize that I ran away from doing the hard work required to make leaps instead of small steps. But, more importantly, I understand that I hadn’t considered the need to work backwards before I started moving forward.

When my sister and I started this project, I gave only a passing thought to those deep-rooted issues I listed above. Those very character issues led me into my loosey goosey financial situation in the first place. Can I simply follow a financial formula to get me past them? Maybe. Yet, how did I expect to just start keeping copious, accurate financial records without a tool and a designated time or method of doing so? How could I fully integrate my financial life with my husband’s if we didn’t take time to strategize how to do it? Not even 10 minutes worth of time? How could I hope to maintain the courage of my convictions if my husband and I weren’t on the same page?

My plan to move forward involves addressing these lacks — because I will move forward, however slowly.

I’ve decided instead of giving up — or just going to therapy — I’m going to face fears, of financial shortcomings, of character flaws. I will try again to get my financial life in order and build on the small steps I have made, such as creating a joint bank account, tracking expenditures and creating a needs/wants/savings balance sheet.

The first nine months of this project haven’t been a complete wash. I have learned that when it comes to personal finances, numbers are not the only things that matter. Gone are my delusions I’d have my financial life in order in 12 months. Ha! Silly me.

To really move forward, I now realize I need to incorporate other aspects of my life into this spreadsheet, as well. Blood, sweat and tears are involved and I must go there. All the way there, by first working backwards. Two steps back – three steps forward.

That is my plan.