So we are doing taxes and financial aid forms for colleges ($55K a year for college! Really? Just in case there wasn’t enough of a divide between the 99 percent and the 1 percent . . . sheesh don’t get me started). We are up to our eyeballs in money talk these days. So for a minute or two I am going to put off the actual hard-core analysis of breaking down our finances and skip to healthy, simple (and cheap) food, which is what I’m trying to work on every day, anyway.
 I’m trying the basics: Living my life responsibly and making my own stuff, when I can – and trying to learn something new every day. Recently, I learned that I can make yogurt. This is not trumpets-blaring news, I know. But it’s exciting for me . . . I finally did it after wondering about it for, like, ever.
Folks have been making yogurt – in a zillion different forms – all over the world for generations upon generations, probably as long as mammals, bacteria and humans have co-existed. (I’m picturing the first moment of yogurt – some suspicious wife passes some old, curdled milk toward her husband and says, “Taste this – is it still good?”) I am happy – okay, proud – to now be part of the flow of the history’s yogurt-making peoples.
I can’t believe it took me this long to try yogurting myself. This is easy, tasty and cheap – just like they did it in the old country. It is really a testament to the power of marketing that we all go out and buy this stuff when it is so easy and soooo much tastier to make it at home. This yogurt does not resemble the typical grocery store kind at all. It’s more like what you’d get from Greek yogurt – but the flavor is not just tangy, it’s delicious. Maybe because it is made so fresh.
 Yogurt
Adapted from Milk: The Surprising Story of Milk Through the Ages by Anne Mendelson (Although the recipe is all over the place, I like to cite a reliable source.)
If you and/or your family are not yogurt freaks, like we are, you could just cut this recipe in half. It works just fine and heats and cools faster.
Ingredients:
1/2 gallon whole or 2 percent milk
3 tsp. plain unflavored yogurt with active cultures
Equipment:
2 quart-sized glass jars
Gas oven with pilot light (or not, see Note below)
Candy thermometer (or you can just eyeball it)
1. Heating/Cooling: Pour the milk into a heavy saucepan. Attach the candy thermometer, if using. Heat to 180F (until it’s just about to boil). Take the milk off the heat and cool to 110 º F (not quite hot to the touch). You can put your pot in a larger bowl with ice water to speed up the process to 10-15 minutes or so. Or you can just let the milk cool on its own (while you watch the Daily Show, for example) for 25-30 minutes or so.
2. Inoculating: Put 3 Tbsp. of store-bought yogurt in a small bowl and stir about 1 cup of the milk into it. Then stir this mixture back into the pot of milk.
3. Incubating: Pour the milk into the two quart-sized glass jars. Gently place the two jars in the oven – no need to cover – and then do not disturb or jiggle or bounce or jounce or anything for 6 -7 hours. My routine is to make this overnight – the kitchen is quiet, and I get to cook while I sleep. Nice.
4. Waking: In the morning, shuffle into the kitchen to find two containers of yogurt in the oven! I save one to use in smoothies (awesome – although what will I do without that constant stream of 32 oz. plastic yogurt containers coming into my life?). With the second container, I move onward – and upward – to step 5.
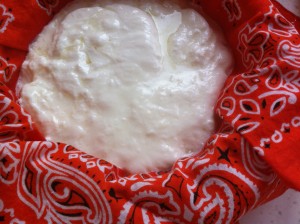
5. Draining: This step isn’t necessary if what you are want is a yogurt to use in smoothies, or if texture is not a big deal to you. But if you want a hauntingly delicious yogurt to eat with honey or preserves, or to use in a dip or salad – you really must drain it. Once I tasted the drained yogurt – I couldn’t get the taste out of my head. I wanted more . . . Here’s the step: Line a strainer with a bandana (see fancy orange bandana in photo above) and place it over a bowl deep enough to catch 4 cups liquid. Then pour the yogurt into the strainer and let sit about 3 hours. Turn the yogurt out into your storage (or serving) container and stir until smooth. Serve yourself some yogurt right away, spoon some honey on top and . . . prepare to have your mind blown. Enjoy.
Note: Denise has joined the yogurt-making flow by making yogurt without a pilot-lit oven. You go girl! Just use a hot-cold plastic container, or wrap the jars in towels and put them in a cooler. Whatever it takes to keep the incubating yogurt cozy at 110 º F. If the temperature drops below 110 º F, the yogurt will be thinner or take longer to set. But as long as you have the active starter and a peaceful place for the yogurt to incubate – yogurt will happen.
P.S. Making yogurt at home is also – big surprise – cheaper than buying it at the store. Two quarts of this yogurt cost me $3.00 to make (I used 1/2 gallon of organic milk, which I buy at Trader Joe’s for $5.99/gallon). While the price for one quart of organic yogurt at TJ’s is $2.99. So I am getting two for the price of one by making my own. True – when I don’t buy the yogurt at the store I do not get the quite useful plastic tub it comes in . . . but I will trade the tub out for being that much closer to saving 30 Large.
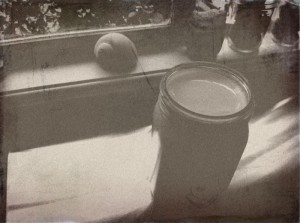
P.P.S. Did you like my old-school yogurt photo? I took the photo on my phone and old-schooled it on this cool Japanese site. I’m going there now to make all my photos old.
